360º and Panoramas are coming
July 11, 2026 • 6 min read
This one started in Flores. That’s where I developed the first prototype: a small 360° panorama app, an experiment to see whether I could properly bring these photos into my website.
I take 360° photos and panoramas alongside my regular photos, and until now, they had nowhere to live here. I didn’t want a link or some third-party embed. Native. Mine. Today, I finished the implementation, and it has come a long way from that first experiment.
I like to take my time with ideas like this. Let them mature. Think through all the ways they can integrate with the platform I already have: the design, the performance, and the way the site should feel. A 360° viewer is easy to bolt on. Making it feel as though it has always been part of the website is the actual work.
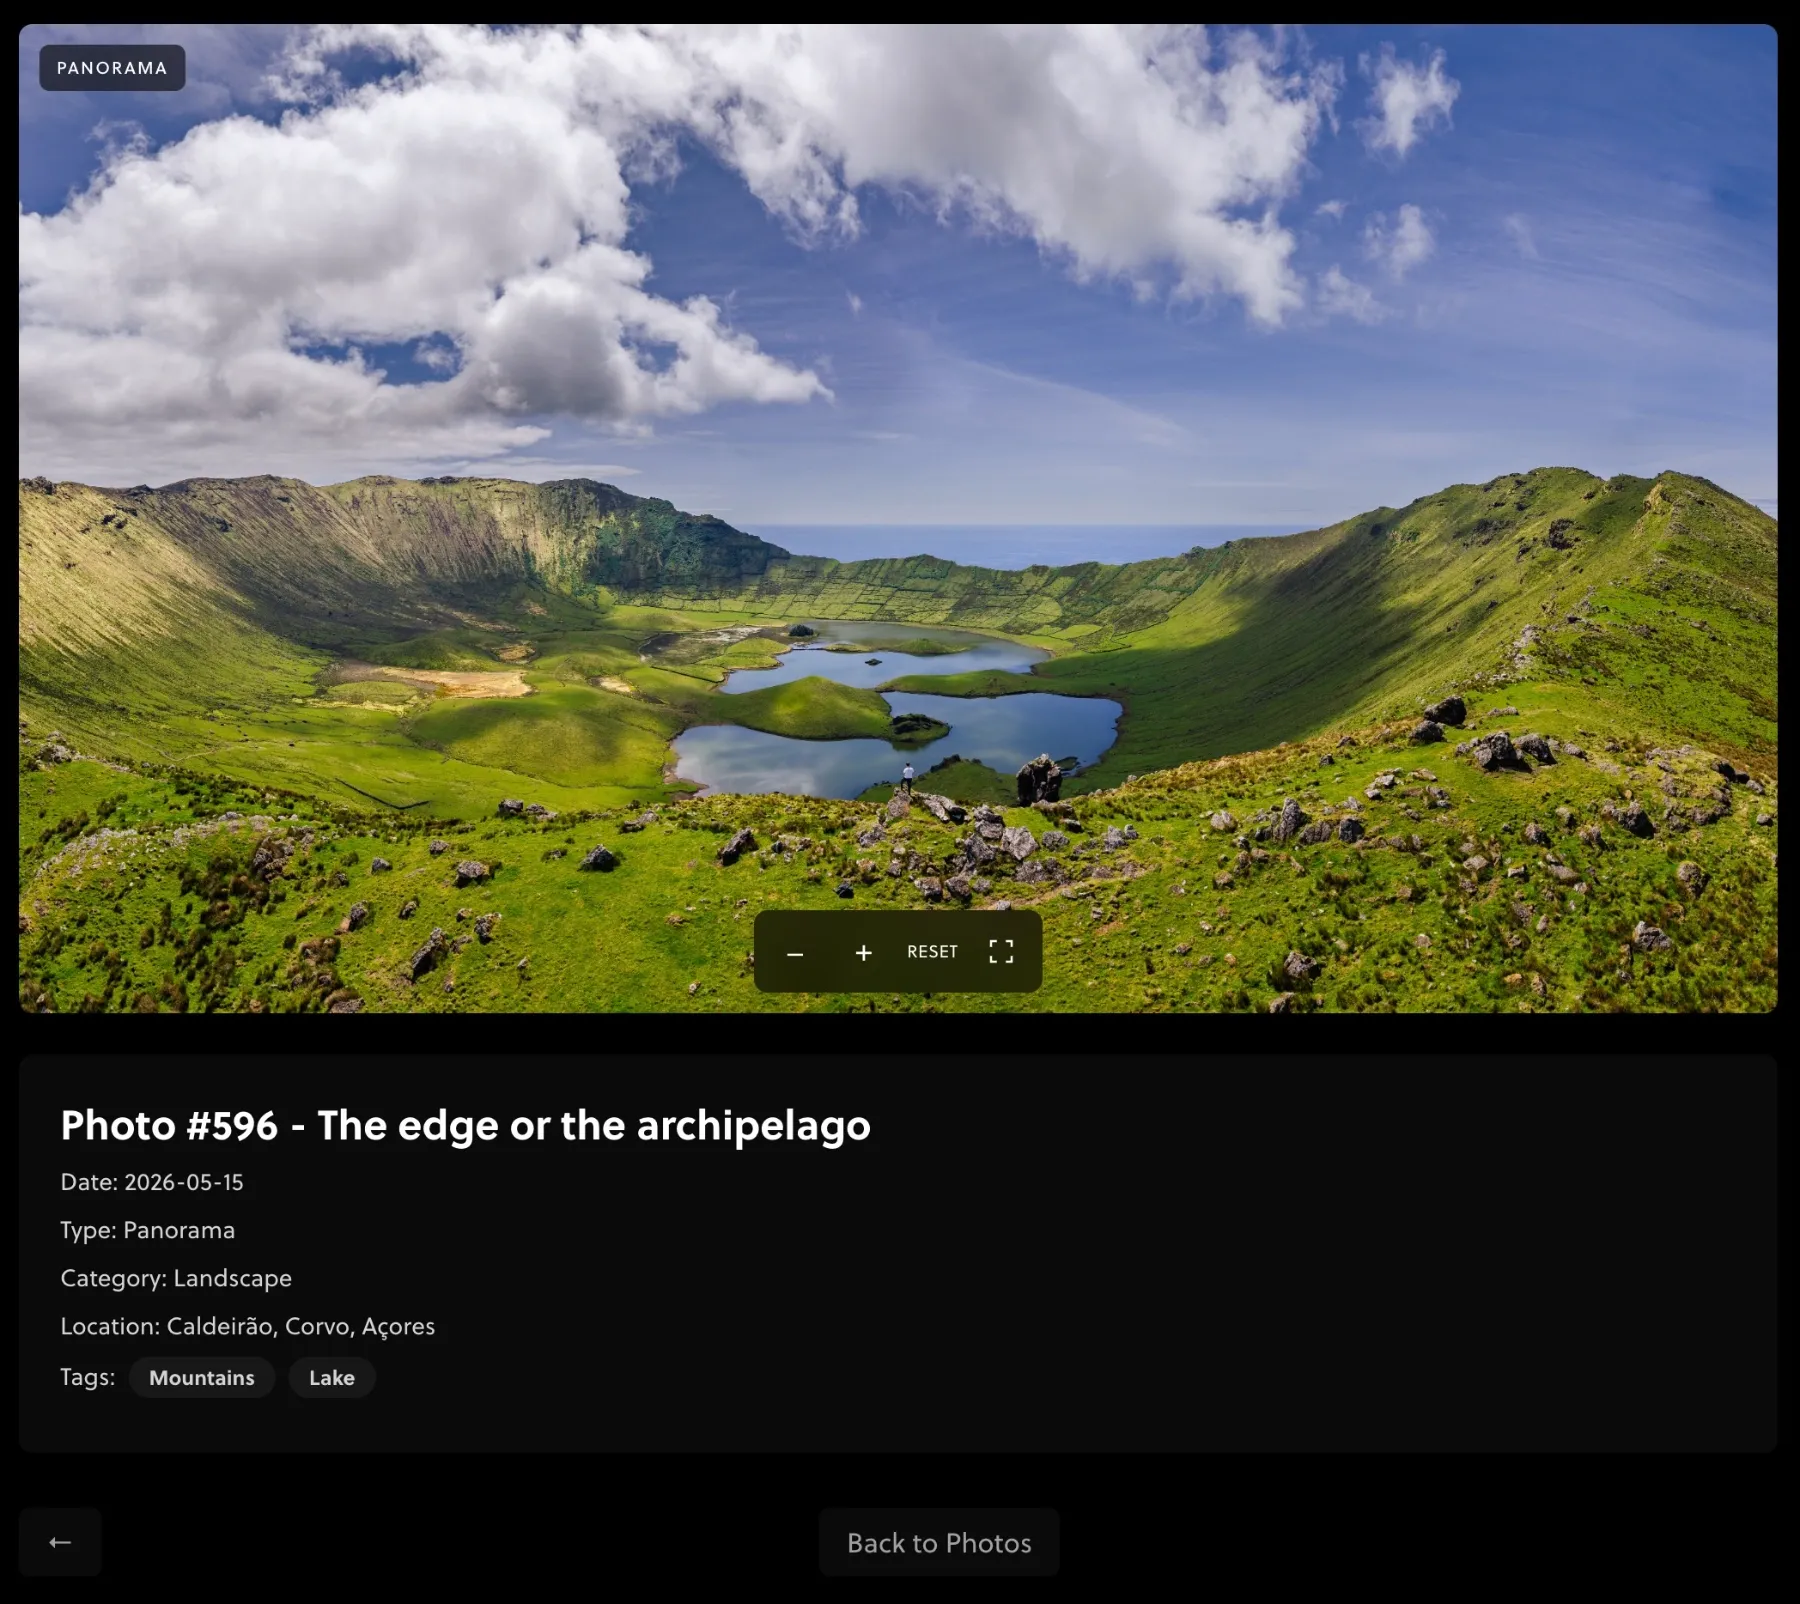
The viewer itself is a WebGL sphere. You’re standing inside it, with the equirectangular image wrapped around you and the camera looking outward. The more interesting complexity, though, comes from learning and working with 360° photography itself. Behind the scenes I've learn and experiment with Rectilinear, Cylindrical, Equirectangular, Mercator, Vedutismo, Transverse Equirectangular, Transverse Cylindrical, Transverse Mercator, and Transverse Vedutismo projections.
One of the most interesting examples is the Mercator projection. It is the world map most of us grow up seeing, so we tend to accept it as an accurate representation of the planet. It is not a true-to-scale map. Areas near the poles are greatly enlarged, while regions closer to the equator appear much smaller than they really are. We take that distorted version of the world for granted simply because it is the one we know best.
Each one bends the world differently, each one has a purpose, and even a “normal” panorama takes time and practice to perfect. The same sphere that renders my 360° photos also handles flat panoramas, with a dedicated viewer for panning and zooming across those very wide frames. I wanted to show some of this work, and now I finally can.
Then there’s everything behind it.
These files are huge. A single 360° original can be anywhere from 50 MB to 300 MB, and I refuse to compress the source file. The website displays an optimized version everywhere, while the viewer loads a near-original version. I still don’t expose the true original because of its size and because I don’t want the source file to be publicly accessible. Uploading files like that reliably means the upload cannot happen in a single request. Instead, uploads are split into resumable chunks, assembled and streamed into storage as multipart parts. If the connection drops at 80%, it retries the chunk, not the entire file. The first bytes of the first chunk are checked against the file’s actual signature before anything else happens.
The frontend had to be the opposite of that complexity. Clean. A custom, it-just-works experience. But “just works” is built on deliberate constraints, and this is where most of my thinking went. Nothing loads automatically. A 360° photo is a large download, and forcing that onto someone’s mobile data without asking is rude. You see a normal photo with a button, “View 360°”, and the file size displayed beside it. Only when you click does it begin downloading, with real progress shown megabyte by megabyte.
Keyboard navigation had to be negotiated. On my website, the arrow keys already move between photos, and now they also move between pages in listings. But inside an active 360° viewer, the arrows should look around, not throw you onto the next photo after you have just downloaded 50 MB. The viewer therefore takes ownership of the keyboard while it is active and gives it back when it is not.
GPU limits are real. A full-resolution 360° texture can consume half a gigabyte of video memory if you are naive about it, which is enough to crash a tab on most phones. The viewer checks what the device can actually handle, caps the texture accordingly, and decodes the image at the largest safe size.
Mobile received special attention. There is pinch-to-zoom, dragging with inertia so that a flick keeps the image spinning naturally, and fullscreen support with a fallback for iOS, since Safari does its own thing. Then there is the gyroscope. Turn on motion control and the photo follows the phone as you move it around, making it feel as though you are standing inside the scene instead of dragging it. That part uses quaternion mathematics, converting device orientation into camera rotation while compensating for screen rotation. On iOS, it also requests permission to access the motion sensors, as it should.
And it looks awesome. That’s the part I care about most. It doesn’t feel like a plugin. It feels like the website has grown a new ability.
While I was in there, I also did something I had been postponing: I refactored the entire photo back office. The old list view was fine for blog posts but terrible for photos. It is now a visual grid with large thumbnails, statuses you can see from across the room, and unapproved photos literally greyed out with a red border. You can filter by type, category, colour, status, and date. The date filter understands written language. I can type “3 dez 2026 a 10 jan”, and it understands, in either Portuguese or English, with the year being optional. The arrow keys move through the archive page by page. Managing hundreds of photos finally feels fast.
Then came the most painful part, the one I kept delaying: photo dates.
I have years of archives to upload, and every single photo needed to have its date entered manually. Open Google Photos, find the image, check the date, and type it into the form. Multiply that by hundreds. It was so time-consuming that it was genuinely stopping me from adding my older work.
Now, I simply drag the photo in and the date fills itself. The trick is that my upload pipeline converts images in the browser before sending them, which strips the metadata. To avoid losing it, the original file is read the moment it is selected. Its EXIF data is parsed directly in the browser, and the capture date is placed into the form before the conversion ever touches the image. That one feature changes everything about the archive. A couple of years’ worth of photos are coming.
What's coming next
I've already added a 360º capture from 2025 and two panoramas, but I'll keep adding much more in the next weeks as well as the archive. I'll probably transform the pagination in infinite scrolling view with a much more demanding cache system for a much smoother photo experience.